【Flutter】FCMとSupabase Edge FunctionsでPush通知〜第3回〜
前回に続き、今回はSupabaseからのpush通知送信まで進めていきます。
改めて開発の流れの紹介
- Firebaseの設定
- Firebaseの環境分け(devとprod)
- FlutterでFirebase初期化を実装
- FCMの設定【← 第1回はここまで】
- Flutterで通知許可ダイアログを実装
- バックグラウンド・フォアグラウンド・ターミネート状態でのPush通知の受信
- Firebase Messagingでテスト送信【← 第2回はここまで】
- Supabaseインストール
- Supabase Edge Functionsの実装
- Webhookを設定
- SupabaseからFlutterアプリにPush通知を送信【← 第3回はここまで】
Supabaseインストール
Supabase Edge Functionsを作成するにあたり、Supabaseのインストールからしておきます。
% brew install supabase/tap/supabase
...
==> Running `brew cleanup supabase`...
Disable this behaviour by setting HOMEBREW_NO_INSTALL_CLEANUP.
Hide these hints with HOMEBREW_NO_ENV_HINTS (see `man brew`).
Supabase Edge Functionsの土台を作成
% supabase init

Generated VS Code settings in .vscode/settings.json. Please install the recommended extension!
Finished supabase init.
% supabase functions new push_notification
Denoの環境設定
名前 'Deno' が見つかりません。とエラーが出ているので、new pushで生成されたコードのガイドに従ってDenoの環境設定を行います。
Follow this setup guide to integrate the Deno language server with your editor:
<https://deno.land/manual/getting_started/setup_your_environment>
This enables autocomplete, go to definition, etc.

---
【翻訳】
Deno 言語サーバーをエディターに統合するには、このセットアップ ガイドに従ってください:
<https://deno.land/manual/getting_started/setup_your_environment>
これにより、オートコンプリート、定義への移動などが有効になります。
- VSCodeで「Deno」の拡張機能を追加
Ctrl+Shift+PのコマンドパレットからDeno: Initialize Workspace Configurationを実行- ワークスペース用に Deno を構成
devとprodで環境分け
firebaseからdevとprodで秘密鍵の生成をしておきます。
.png?w=1428&fit=max&fm=webp)
Supabase Edge Functionsの実装
Supabase Edge Functionsの実装の一部分だけを紹介します。
DB構成によって変わるので、ご自身の環境に合わせてコードを変更してください。
supabase/functions/push_notification/index.ts
import { createClient } from "npm:@supabase/supabase-js@2";
import { JWT } from "npm:google-auth-library@9";
import { config } from "<https://deno.land/std@0.138.0/dotenv/mod.ts>";

await config({ export: true });

interface NotificationManagement {
  id: string;
  title: string;
  body: string;
  created_at: Date;
  updated_at: Date;
}

interface WebhookPayload {
  type: "INSERT";
  table: string;
  record: NotificationManagement;
  schema: "public";
  old_record: null | NotificationManagement;
}

const supabase = createClient(
  Deno.env.get("SUPABASE_URL")!,
  Deno.env.get("SUPABASE_SERVICE_ROLE_KEY")!
);

Deno.serve(async (req) => {
  const payload: WebhookPayload = await req.json();

  const { title, body } = payload.record;

  const firebaseClientEmail = Deno.env.get("FIREBASE_CLIENT_EMAIL");
  const firebasePrivateKey = Deno.env
    .get("FIREBASE_PRIVATE_KEY")!
    .replace(/\\\\n/g, "\\n");
  const firebaseProjectId = Deno.env.get("FIREBASE_PROJECT_ID");

  const accessToken = await getAccessToken({
    clientEmail: firebaseClientEmail,
    privateKey: firebasePrivateKey,
  });

  for (const account of accounts) {
    const fcmToken = account.account_fcm_token?.fcm_token;
    if (fcmToken) {
      await sendPushNotification(
        fcmToken,
        title,
        body,
        accessToken,
        firebaseProjectId
      );
    }
  }

  return new Response("Push notification sent successfully", { status: 200 });
});

async function sendPushNotification(
  fcmToken: string,
  title: string,
  body: string,
  accessToken: string,
  projectId: string
) {
  const res = await fetch(
    `https://fcm.googleapis.com/v1/projects/${projectId}/messages:send`,
    {
      method: "POST",
      headers: {
        "Content-Type": "application/json",
        Authorization: `Bearer ${accessToken}`,
      },
      body: JSON.stringify({
        message: {
          token: fcmToken,
          notification: {
            title,
            body,
          },
        },
      }),
    }
  );

  const resData = await res.json();

  if (res.status < 200 || res.status > 299) {
    console.error(
      `Push notification sending failure: ${JSON.stringify(resData)}`
    );
    throw new Error(
      `Push notification sending failure: ${JSON.stringify(resData)}`
    );
  }
}

const getAccessToken = ({
  clientEmail,
  privateKey,
}: {
  clientEmail: string;
  privateKey: string;
}): Promise<string> => {
  return new Promise((resolve, reject) => {
    const jwtClient = new JWT({
      email: clientEmail,
      key: privateKey,
      scopes: ["<https://www.googleapis.com/auth/firebase.messaging>"],
    });
    jwtClient.authorize((err, tokens) => {
      if (err) {
        reject(err);
        return;
      }
      resolve(tokens!.access_token!);
    });
  });
};
ちなみに、firebaseのservice-account.jsonあたりの値をEdge Function Secrets Managementに保管しておきました。
※supabaseの公式youtubeで公開されていたjsonファイルのimportや.envファイルを試しましたが うまくいかず、この方法が確実でした。
Supabase Edge Functionsのデプロイ
以下コマンドからデプロイします。
% cd supabase

# dev環境 デプロイ
% supabase functions deploy push_notification --project-ref プロジェクトref(<https://supabase.com/dashboard/project/〇〇〇〇/settings/functionsの〇〇部分)>

# prod環境 デプロイ
% supabase functions deploy push_notification --project-ref プロジェクトref
デプロイ成功しました。
.png?w=1428&fit=max&fm=webp)
Database Webhookを設定する
Supabaseの管理画面からWebhookを作成していきます。
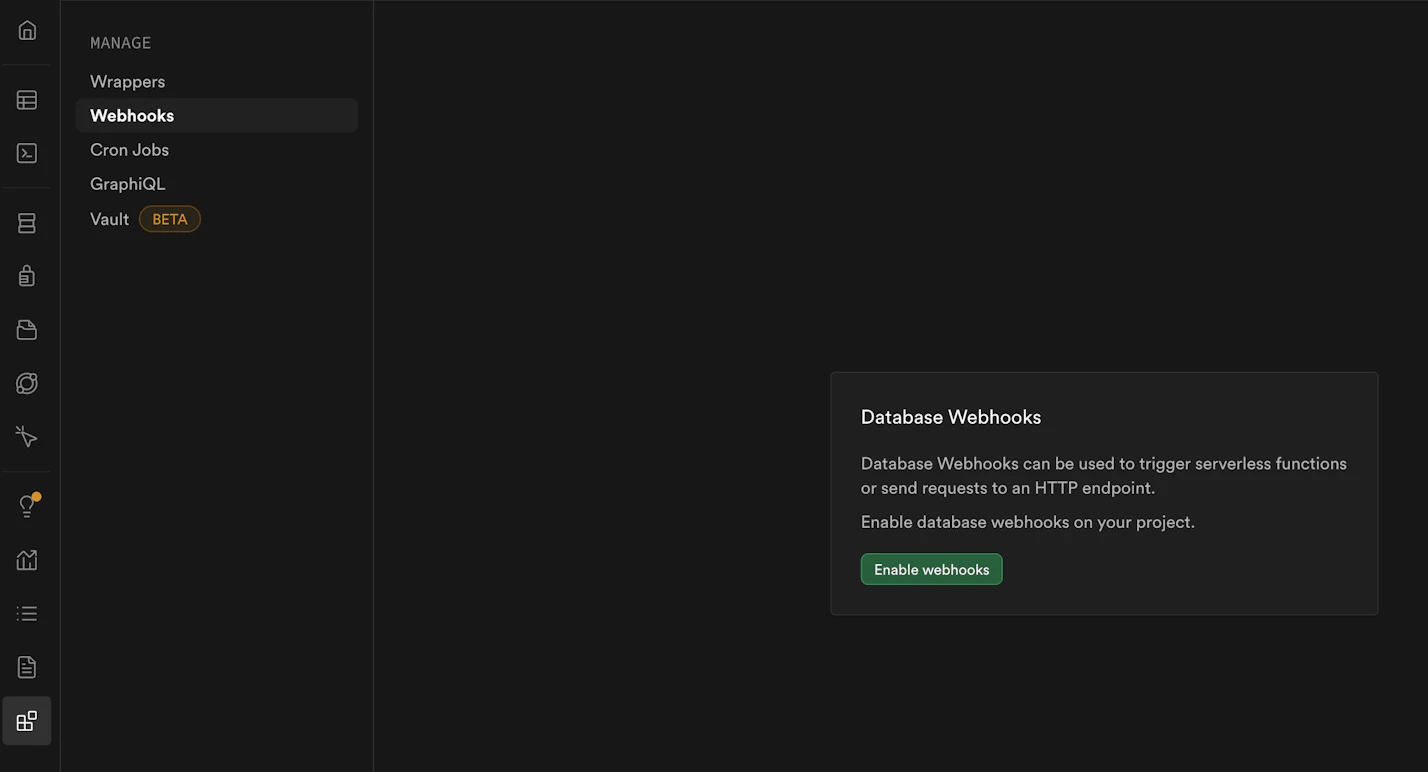
.png?w=1428&fit=max&fm=webp)
Webhook configurationまでは画像の通りですが、それ以下の項目はデフォルトのままで作成しています。
.png?w=1428&fit=max&fm=webp)
SupabaseからFlutterアプリにPush通知を送信
Functions関数もデプロイして、データベースwebhookの設定もできたので、Push通知を手動でトリガーしてみましょう。
DBからインサート もしくは curlコマンドで試してみるとPush通知が届くようになります。
まとめ
Supabase自体触ったことなかったのですが、これを機に触ってみて、firebaseよりは使いやすかったなという所感です。
今後、案件でもSupabaseを扱う機会があれば、面白そうです。
Anycloudでは一緒に働くメンバーを募集しています!
Anycloudは、ユーザーの心を動かす体験を届けることを大切にしています。フルリモート・フルフレックスの環境のもと、ライフスタイルに合わせた働き方を実現しながら挑戦したい方を歓迎します。詳細はこちらをご覧ください。

